Halloween is a spooky time of year when you can walk down the street and see all the creative ways that people decorate their homes for the season. Pumpkin spiced drinks make their seasonal return to stores, and children everywhere get to live out their dream of eating candy all day. For all those who are looking for fun activities to do with their kids for the holiday, I put together this list of a few crafts and treats that are perfect opportunities for kids to get involved in cooking and home decorations.
Pumpkin Carving Tips
Part of the holiday fun of Halloween is decorating your house for the season. While not everyone has a box of decorations waiting in their closet for this occasion each year, anybody can get a couple pumpkins to carve with their family and participate in the festive atmosphere. Whether you choose to follow a stencil or freehand a design, it’s sure to be fun, and keeping a couple of these tips in mind will make the process easier all around.
Use disposable gloves: The stringy texture of pumpkins is very off putting to some people, so being prepared with gloves can significantly improve their experience.
Set down a tarp: If you have a tarp or an old shower curtain to carve pumpkins on, it can make cleaning up afterwards easy. As long as you keep the mess on the tarp, you can collect it all at once to throw out at the end.
Use battery powered candles: Nobody wants to find a flaming pumpkin on their porch. Using electric lights instead of the classic open flame to light your jack-o-lanterns significantly reduces fire hazards.
Make a notch in the lid: When opening the top of a pumpkin it can be hard to fit the lid back into the same place. If you cut a triangular notch in the lid it makes it easy to fit it back onto the pumpkin once removed.
Use a grocery bag: One easy way to remove the innards from your pumpkin is to place a plastic bag over it and then shake it upside down, letting the seeds and strings fall out the newly made hole into the bag. This is an easy way to reduce the mess from scooping out pumpkin with your hands or a spoon.
Discard jack-o-lanterns at the sight of mold: Once a pumpkin is carved, it won’t last very long. Once you see mold appear on the inside of the pumpkin, it will likely only last another day before it starts melting into a difficult to manage sludge. In order to avoid the toil of cleaning pumpkin goop, it’s best to discard carved pumpkins when mold appears and the walls of the gourd have just begun to soften.
Paper Pumpkins
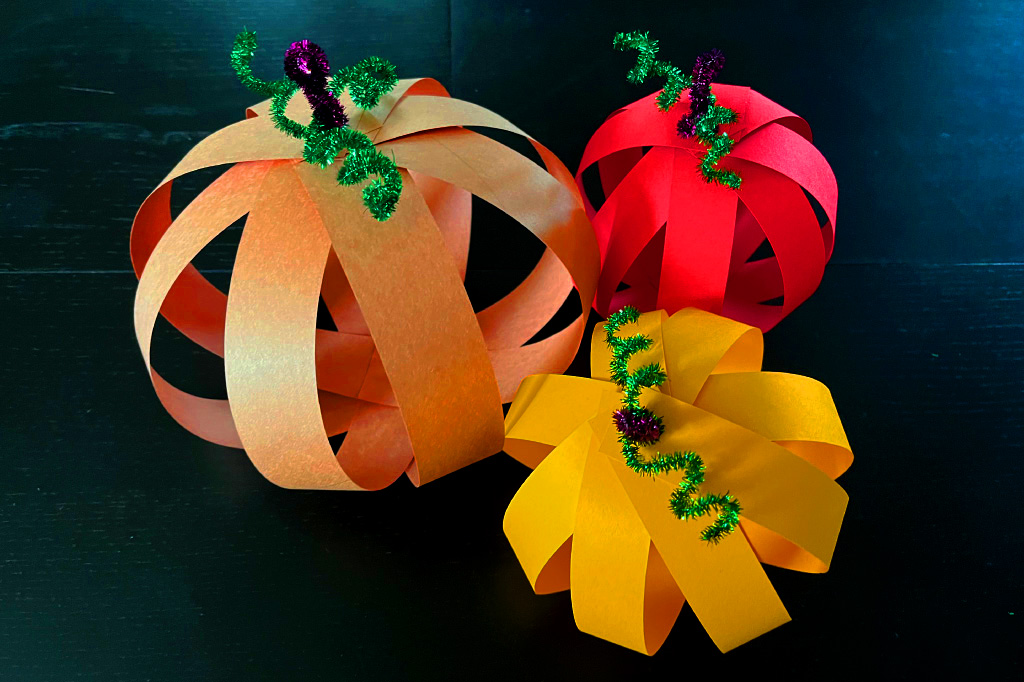
A far less messy option for a Halloween craft is making paper pumpkins! This is a perfect craft to entertain restless children while also giving them an opportunity to help decorate for the season. Unlike traditional jack-o-lanterns these can be made and kept inside on a table as a cute seasonal accent to the space.
What you will need:
- Colored paper
- Pipe cleaners
- Glue
- Hole punch
- Scissors
Step 1:
Cut the colored paper or cardstock into equal 1 inch strips.
Step 2:
Glue one end of four strips together in the shape of a plus sign (+). Do this twice, making two crosses and glue one on top of the other at a 45 degree angle to the first. Now you should have a star shape glued at the center.
Step 3:
Use a hole punch to make one hole at the end of each of the eight strips of paper.
Step 4:
Make a loop in the middle of a pipe cleaner, bringing the ends together. Bend each paper strip up to the center and thread the pipe cleaner through all the holes. Twist the pipe cleaner to keep the paper in place and so it resembles the stem of a pumpkin.
Step 5:
Wrap a second pipe cleaner around the first and curl it around a pen or pencil to make tight spirals. Now you’re done!
Caramel Apples
Munching on a caramel covered apple while walking through the neighborhood collecting candy is a defining Halloween experience for kids all across the country. On a day that is dedicated to the collection and consumption of sweets, candied apples can also be a good way for parents to convince their children to eat something with at least a little nutritional value!
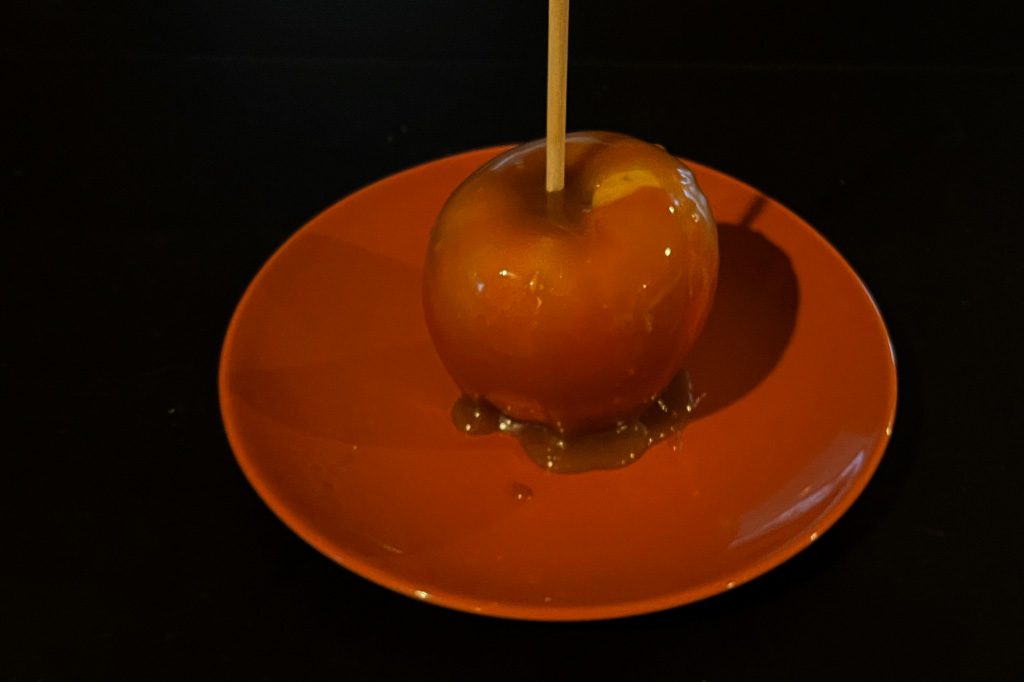
Simply place the apple of your choice upon a wooden dowel and coat it evenly in warm caramel, before setting it upon some parchment paper to harden over the next hour. If you are looking to give your kids a fun holiday activity to do, you can set up a few options for toppings from sprinkles, to chopped nuts, and chocolate syrup for them to decorate their freshly dipped apples. While you could use store bought caramel sauce, it will never set properly like the homemade variety, and making the treats won’t feel nearly as rewarding! Read on to learn how to make it yourself.
Popcorn Balls
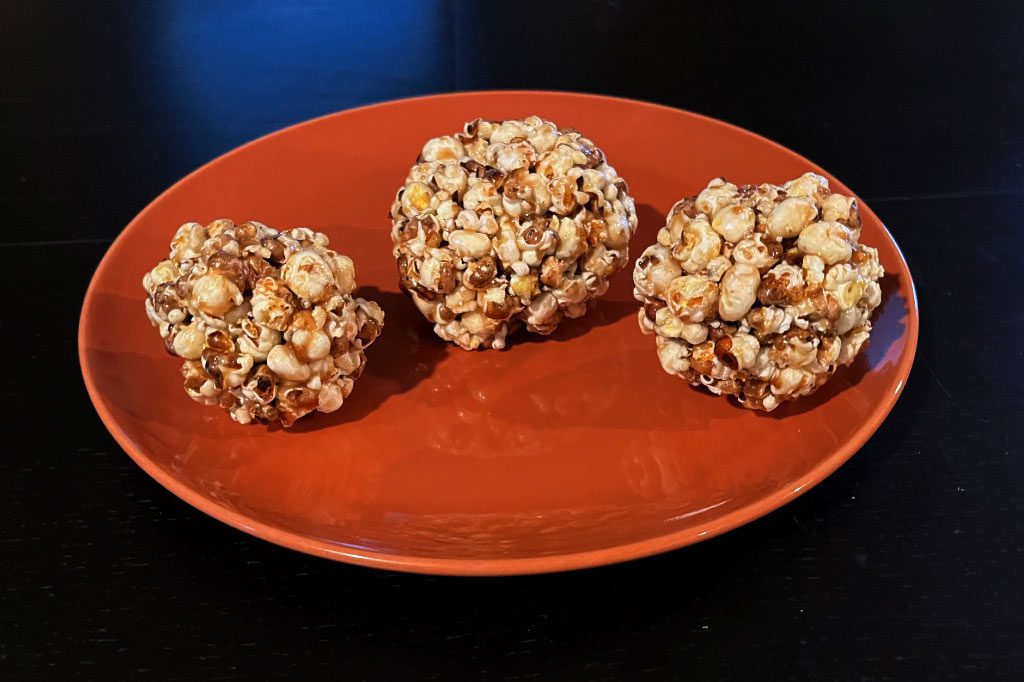
Another classic Halloween treat is the popcorn ball. Sticking with the theme of caramel, this seasonal snack is bound together in the same superheated sugar used for dipping apples, and there is something special about making fresh popcorn that will put a smile on anyone’s face. It’s also remarkably easy!
Ingredients:
- ½ cup unflavored popcorn kernels
- Oil to coat pan
- Salt to taste
- Homemade caramel
Step 1:
Fill a medium sized pot equipt with a lid with just enough oil to coat the bottom and set it over medium heat.
Step 2:
When the oil is hot but not smoking, test it with a couple kernels, which should pop quickly. Once popped, pour in the remaining kernels, cover with a lid and remove from heat to prevent burning.
Step 3:
Shuffle the kernels in the pot until they have all popped, then pour them into a large bowl and salt to your preference.
Step 4:
Pour your desired amount of caramel sauce over the popcorn, mixing it together, and form into balls once at a workable temperature. Coating your hands lightly in water can help prevent the caramel from sticking to them.
If you experience difficulties getting your popcorn balls to hold their shape, you can bind them in plastic wrap until they cool and hold their form on their own. This is also a great way to store and transport these sticky treats.
Homemade Caramel Sauce
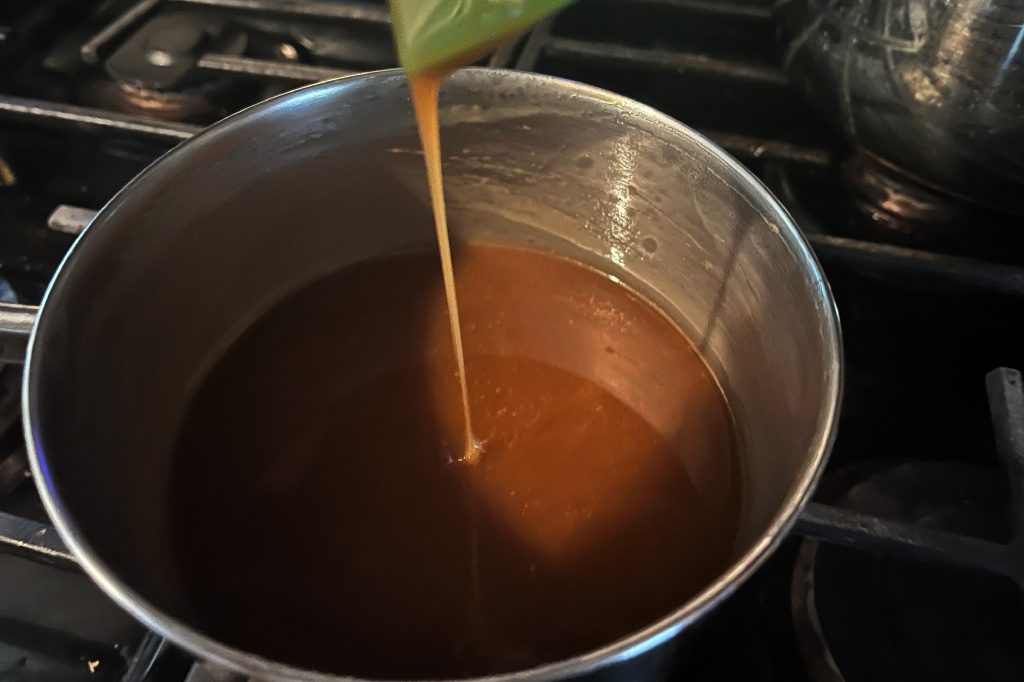
Making your own caramel might seem like a daunting task, since cooking the mixture to the proper temperature makes all the difference in the consistency of the final product, but a candy thermometer makes the process very manageable. Cooking your caramel to 250 F will result in a much more pliable candy once cool, compared to the same mixture cooked to 280 F which results in a firmer product referred to as “soft crack stage.” This recipe makes enough caramel to either coat 4-6 apples or make 1 cup of un-popped popcorn kernels into popcorn balls.
Ingredients:
- 1 cup brown sugar
- ¾ cup heavy cream
- ½ cup corn syrup
- 2 tbsp unsalted butter
- ¼ tsp salt
- ¼ tsp vanilla extract
Step 1:
Add brown sugar, heavy cream, syrup, and salt to a saucepan combining over medium-low to medium heat. It is easy to burn caramel on high heats so if you notice the sides of the pan starting to get charred, it’s best to turn down the stove.
Step 2:
Once the ingredients are incorporated add the butter, allowing it to gradually melt into the sauce. Adding the butter in this step prevents it from getting scorched in step 1 while combining the more viscous ingredients.
Step 3:
Using your candy thermometer, cook the mixture until it reaches a temperature of 250 F for a soft caramel (bring it to 280 F for a firm set on dipped apples). Stir the mixture minimally to avoid creating lasting bubbles, but be careful not to let the sugars harden on the sides or bottom of your pan.
Step 4:
Once the proper temperature is reached, remove from heat and let the caramel stand for 10-15 minutes until thickened, but before the point that it begins to solidify. At this point the sauce can be used to dip apples (washed, dried, and refrigerated beforehand) or poured over freshly made popcorn and molded into balls.
Spiced Pumpkin Cupcakes
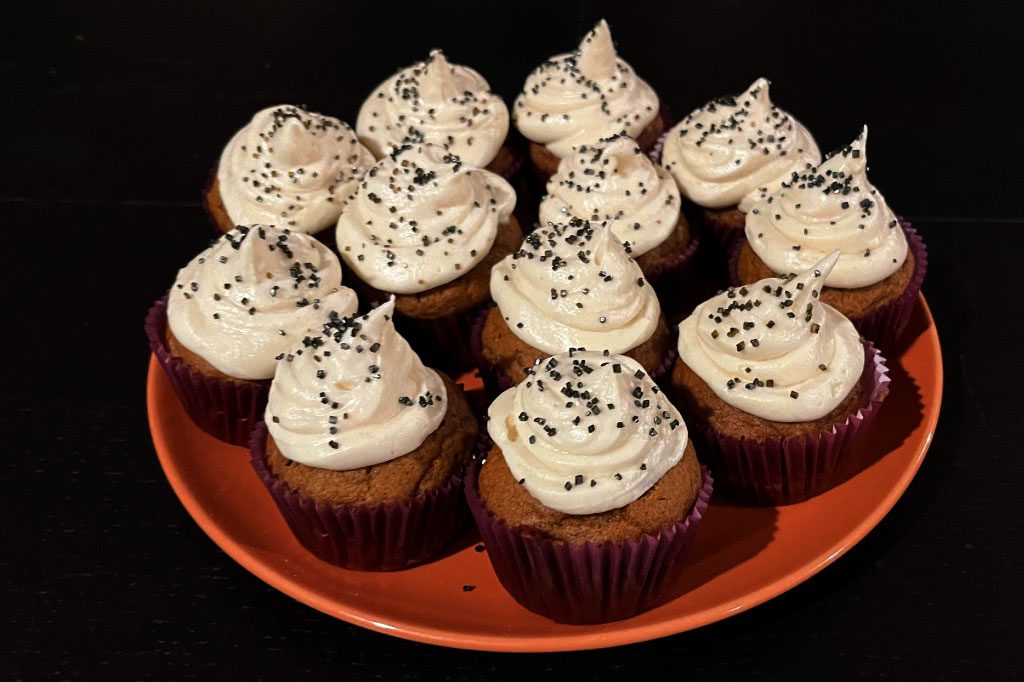
While adults tend to be less tempted by caramel covered apples and popcorn, it would be a struggle not to go for a second one of these cupcakes! The moist, spongy base of the cupcakes turn out tasting somewhere between a pumpkin pie and a carrot cake, which pairs perfectly with cream cheese icing. I used purple cupcake liners and topped them with black sugar sprinkles to accentuate the Halloween colors, which turned out spectacular!
Ingredients:
Batter:
- 1 cup all-purpose flour
- 1 cup canned pumpkin
- ¾ cup brown sugar
- ½ cup vegetable oil
- 2 large eggs
- 1 tsp baking powder
- 1 tsp ground cinnamon
- 1 tsp vanilla extract
- ½ tsp ground allspice
- ½ tsp ground ginger
- ¼ tsp ground nutmeg
- ¼ tsp ground cloves
- ½ tsp baking soda
- ½ tsp salt
Icing:
- 8 oz cream cheese, softened
- ½ cup unsalted butter, softened
- 2 cups powdered sugar
- 1 tsp vanilla extract
- 1 pinch of salt
Step 1:
Preheat your oven to 350 F and line a 12 count muffin pan with cupcake liners.
Step 2:
In a large bowl combine the dry ingredients (flour, baking powder, baking soda, salt, cinnamon, other spices). In a separate bowl mix together the wet ingredients (brown sugar, eggs, pumpkin, vanilla, vegetable oil).
Step 3:
Add the wet ingredients to the dry, mixing until well incorporated, then divide batter between the cupcake liners. Each should be about ⅔ full to avoid overflow. Bake the pan at 350 F for 20-22 minutes or until a toothpick inserted into the center comes out clean.
Step 4: Making Frosting
In a large bowl beat the softened cream cheese and butter together with a handheld mixer until creamy. Add in vanilla, a pinch of salt, and 1 cup powdered sugar to start. At this point, add ¼ cup powdered sugar then taste the icing to test its sweetness. Repeat this process until the frosting has reached the desired level of sweetness (typically between 1 ½ – 2 cups total sugar).
Step 5:
Allow cupcakes to cool completely, then frost and decorate them to your heart’s content!
Looking For A New Home?
Check out these active listings!
126 Amundsen St. A
$429,000
3 Bedrooms – 2 Full & 1 Half Baths
1,814 Sqft – Built 2023
1005 W 7th 1/2 St.
$2,250,000
4 Bedrooms – 4 Full & 2 Half Baths
4,537 Sqft – Built 2023
1310 Beachton St.
$375,000
1-2 Bedrooms – 1 Full Bath
4,340 Sqft – Built 1890
12235 Greencanyon Dr.
$275,000
4 Bedrooms – 3 Full & 1 Half Bath
2,638 Sqft – Built 2019
3767 Durness Way
$2,000,000
4 Bedrooms – 3 Baths
4,759 Sqft – Built 2023
5911 Dry Brush Pl.
$289,000
3 Bedrooms – 2 Full & 1 Half Bath
1,648 Sqft – Built 2021


